Showing posts with label howto. Show all posts

Dukto, a Multi platform file sharing app in windows, mac and Linux as well as in portable devices such as Phone, Tablets, etc. Dukto acts as a Shareit app but only difference is that you must have to connect your device in same network.

Some Features of Dukto is: 


  1. simple user interface
  2. high speed file transfer(single file or multi file transfer)
  3. can be used in portable devices as well as in your pc with any OS
  4. free and opensource

Installing and Using Dukto

Here is will show you how to connect your linux PC and android device and transfer file

At first you must have to install Dukto in your PC as well as in your Android Device

Download for ubuntu 14.04 and linux mint 17

For 32 bit system

- sudo apt-get install gdebi - wget download.opensuse.org/repositories/home:/colomboem/xUbuntu_12.04/i386/dukto_6.0-1_i386.deb - sudo gdebi dukto_6.0-1_i386.deb

For 64 bit system

- sudo apt-get install gdebi - wget download.opensuse.org/repositories/home:/colomboem/xUbuntu_12.04/amd64/dukto_6.0-1_amd6 4.deb
- sudo gdebi dukto_6.0-1_amd64.deb


For android device download from playstore


After you install Dukto and connect your devices in same network. you will see following screenshots :


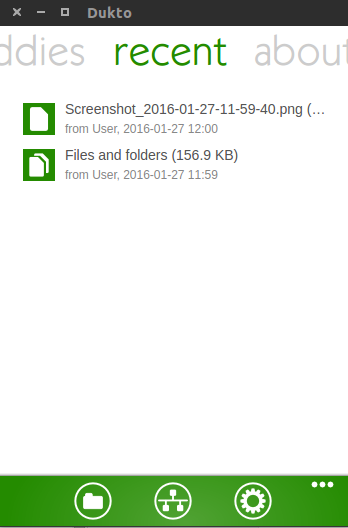
 Then after select the receiver and select the file to send. When the transfer is sucessful you will get following screenshots


This screenshot gives the details of transfers that are done recently.


So this above picture is the Linux distribution logo ASCII art shown in Terminal.You might see a lot of people sharing above screenshot of their terminal and you wonder "How do they do that?" or "I am still Noob to Linux" and you keep worrying. Dhaaaa...stop worrying. This is as simple as eating you breakfast though you might have to install certain packages and software in your Linux distribution.

Screenfetch is one of the simplest way to display your Linux distribution logo ASCII art in your own terminal and not only this Screenfetch too displays your basic hardware specification of your laptop with theme and font that are currently you are using.

Install screenfetch in your Linux Distribution :

1) Install Screenfetch in Ubuntu based distros such as Linux Mint, Elemantary Os, Zorin Os, etc :
             
             sudo apt-get install screenfetch

Note : For Ubuntu 14.04 based distros, they must have to add PPA:

             sudo apt-add-repository ppa:djcj/screenfetch
      sudo apt-get update
      sudo apt-get install screenfetch

2) Install Arch-based linux distros such as Manjaro, Chakra,etc : 

      sudo pacman -S screenfetch

3) Install in Fedora based distros:

       sudo dnf install screenfetch

after installing screenfetch, its very easy to use. just open your terminal(ctrl+alt+t) and type
                screenfetch 
and see the magic.


You will see your Linux distribution Logo ASCII art along with your hardware specification. Enjoy your Screenshot sharing too.

source: itsfoss


Features :
  1. Add/ Remove Kali linux repositories
  2. Install all Kali Linux tools
Requirements :
  1. Requires Python 2.7 or greater
  2. A Linux OS (based on Ubuntu)
Installation :
just open terminal and copy and paste following code : 

             sudo su
       git clone https://github.com/LionSec/katoolin.git && cp katoolin/katoolin.py /usr/bin/katoolin

chmod +x /usr/bin/katoolin
sudo katoolin

if this don't work than,
  1. Just go to https://github.com/LionSec/katoolin.git
  2. Download the zip file from git
  3. Extract it to /usr/bin/ (don't forget to go superuser by typing sudo su)
  4. you will find katoolin.py 
  5. open it by typing   python katoolin.py
  6. And you will see the screen as above
Usage : 
  1. select the number that you want to install
  2. press 0 to install all tools
  3. type back to go back
  4. type gohome to return to default katoolin screen.


Java, provided by Oracle is one of the most commonly used cross platform for developing in web, mobile, desktop, servers,etc. Oracle provides JDK(Java Development Kit) and JRE(Java Run-time Environment) for the java developers where developers can easily develop their applications. Java 8 is one of the latest version of Java released by Oracle and Java 9 will be rolling out in 2016.
Today Here i will tell how to install Oracle Java 8 in Ubuntu or Linux Mint or any same like Distros using PPA.

Installing Java 8 using PPA

to install Java 8, just copy the following commands and paste it in you terminal one by one.
          
               sudo add-apt-repository ppa:webupd8team/java          
               sudo apt-get update
       sudo apt-get install oracle-java8-installer


once java is installer you can check the version of java by typing java -version in your terminal


you can also check out the version of java compiler installed by typing javac -version in your terminal


Also see for how to install Android studio in linux using PPA


.rpm packages are those packages used by Red Hat linux and .deb are those installer files used by Debian Distros. Some time you must have to convert .rpm packages into .deb and vice versa. fot that you must install a program called Alien

Insatalling Alien in Debian Distros

just type the following command in linux

                    sudo apt-get install alien

Convert .rpm into .dev

first navigate to folder having .rpm file and then type in terminal

                   alien packagename.rpm

Convert .deb file into .rpm

first navigate to folder having .deb file and then type in terminal

                  alien -r packagename.deb
                   
Not only this you can convert to other files such as slp package, LSB package, tgz package, etc. yo can see examples into below figures.


Ubuntu Tweak mainly designed to tweak Ubuntu Desktop is an application designed to config Ubuntu easier for everyone. it provides the useful desktop as well as system options.

Whats new in Ubuntu Tweak 0.8.7

  1. Add support for Ubuntu 14.04
  2. Improve the old kernels clean up
  3. Ubuntu tweak cached in logo in GNOME 3.8
  4. Disable app center and source center
Installing Ubuntu tweak 0.8.7


To install Ubuntu Tweak 0.8.7 in Ubuntu and other following forked Linux Distros. Copy the following Terminals commands and paste it into your terminal

            sudo add-apt-repository ppa:tualatrix/ppa
            sudo apt-get update
            sudo apt-get install ubuntu-tweak

Some Screeshots of Ubuntu Tweak 0.8.7 in Linux Mint 17.1 Rebbeca


Source : noobslab
Still fond for Windows look? Don't want to leave Linux? Do Feels good to see Windows Look in Linux?
Than good news to all of you Window looks lover. the Mindows Transformation pack is finally released to get installed on Linux which will give your Linux a windows look. Some Linux geeks might get mad seeing this post or this transformation pack as well but to all those geeks i want to say that this transformation pack is for newbie who has just switched to linux form windows.

Requirements : 

  1. Cinnamon 2.4.x or higher
  2. Mate 1.8.x or higher
  3. GTK 3.12/3.10
  4. Ubuntu 15.04/14.10/14.04 (Cinnamon or Mate)
  5. Linux Mint 17.2/17.1/17 (Cinnamon or Mate)
  6. Other Ubuntu based distro running Cinnamon or Mate desktop
Install Themes and icons

To install Mindows Transformation Themes in Ubuntu 15.04/14.10/14.04/Linux Mint 17.x/17 via PPA open Terminal (Press Ctrl+Alt+T) and copy the following commands in the Terminal:


To install Victory icons in Ubuntu 15.04/14.10/14.04/Linux Mint 17.x/17 via PPA open Terminal (Press Ctrl+Alt+T) and copy the following commands in the Terminal:
                  
                  sudo add-apt-repository ppa:noobslab/icons
                  sudo apt--get update
                  sudo apt-get install victory-icon-theme


Some Screen Shots : 

    1) Cinnamon Desktop Environment


    2) Mate Desktop Enviroment


Occasionally, some applications and games have .run installers which is a bit awkward to see rather than compressed or .deb files. This is similar to what .exe installers do on Windows and is different to the normal methods (at best, using the Software Center, at worst using .deb files) in which applications are installed in a standard way and can be easily removed.To Run the .run applications we must

  • make it executable
  • and run it
There are two ways to make it run and instal it in your device i.e. Graphical way and Terminal way

Graphical way : 

     1) Find the .run installer file in your system


     2) Right click it and go to properties


     3) click in the permission tab


     4) Tick the box saying "Allow executing file as a program"


     5) Double click that .run installer file (run in root mode)

Terminal Way : 

Suppose that i am want to run same xampp-linux-x64-5.5.24-0-installer.run file and it is in the folder /home/kauseek/Downlads/run then follow the below terminal commands to run it


  1. Open Terminal(ctrl+alt+t)
  2. enter cd /home/kauseek/Downloads/run
  3. enter chmod +x xampp-linux-x64-5.5.24-0-installer.run
  4. enter ./xampp-linux-x64-5.5.24-0-installer.run
  5. If step 4 fails with message "Permission Denied" than try entering the command sudo ./xampp-linux-x64-5.5.24-0-installer.run and for this command you will need your administrator password 

source : askubuntu


Great little Radio Player, Doesn't it sounds really great? exactly it sounds great. Great Little Radio Player is an internet radio for live streaming about 300 different radios all around the world from different countries

Hits : 

  1. Stream about 300 online radios
  2. Support multiple languages
  3. Awesome GUI
  4. Sorting based on Genre and Country
  5. Have launcher, notification and top panel

Misses :

  1. Must have to restart after you install it
  2. No integration with Ubuntu sound menus


Install Great Little radio player For ubuntu

To install great little radio player.
            
                  download for 32-bit  
                  
                  download for 64--bit

What is birdie?
Birdie is an desktop twitter client available for Linux.

Hits:

  1. Have a clean GTK which looks awesome in Ubuntu
  2. You can compose new tweet, reply, message, view conversation, retweet, add photos in it.
  3. Provides full support for hash-tags as well as twitter headers.
  4. you can use multiple twitter accounts at a same time.
Drawbacks:

  1. Provides no any desktop notifications
  2. No any panel indicator
  3. no any function to undo any re-tweet
  4. have low refresh rate
  5. as like others contains a lots of bugs
Install Birdie in Ubuntu

Birdie is officially provided PPA for Ubuntu 14.04+. So you can use following terminals commands to install Birdie in ubuntu or in linux mint as well

sudo add-apt-repository ppa:birdie-team/stable
sudo apt-get update
sudo apt-get install birdie

you can also download .deb file from :
                         Download Birdie for 32-bit
                         Download Birdie for 64 bit
                         Download Birdie for Fedora or Debian

Tweet!!! Tweet!!! Tweet!!!

Source: itsfoss

Well if you are a c# developer or if you are a net developer or  you frequently code on Visual studio who happens to use linux than good news to you. Microsoft has recently released Visual Studio Code of all Operating System including linux as well.
Microsoft, one of the top leading company well known for its brand, copyrights, privacy and trademarks has finally walking in the path of open philosophies, freedom and open source.

Here, i will guide you to install visual studio code in Ubuntu

Features

Among the 30 or so programming languages currently supported by visual studio code are : 

  • Javascript
  • c#
  • c++
  • php
  • HTML
  • Markdown
  • SASS
  • JSON
  • Python

Installing Visual Studio Code in Ubuntu

Currently Visual studio code is in its preview release which may contains some bugs, missing features.
in Ubuntu you must have to install Visual Studio Code using ubuntu make,Canonical's handy set of command-line tools for quickly installing a raft of IDEs and developer doo-dahs, zero fuss.
Soo to install Visual Studio Code in Ubuntu you must type the following line of commands in terminal


sudo add-apt-repository ppa:ubuntu-desktop/ubuntu-make
sudo apt-get update && sudo apt-get install ubuntu-make
umake web visual-studio-code


Unistalling Visual Studio Code 

To uninstall Visual Studio code, we'll use the following command in terminal
    
     umake web visual-studio-code --remove

You can install Visual Studio Code by downloading the file from Microsoft: click here


So guys Happy coding in Visual Studio Code

Source : Noobslab